Guitar Tone Cap Taste Testing: Do Different Caps Really Change Your Sound?

Guitar Tone Cap Taste Testing: Do Different Caps Really Change Your Sound?
Written by: Logan Tabor
Published on
January 21st, 2021
Welcome back everyone, to another exciting installment of Make It Monday! Today I was feeling a little nitpicky and decided to jump into the wonderful world of guitar tone caps. This is something I’ve heard people talk about for years but have never taken it upon myself to test first hand. There are obviously a ton of different types and brands of capacitors one could put into their guitar, but for the sake of my sanity I’ll be testing only three. I’ll start with a ceramic disc capacitor, then move on to a Sprague Orange Drop cap of the same value, and lastly one of Mojotone’s Vitamin-T Oil-filled capacitors.
Now, I’m fully expecting to hear some very minor differences, but I’m not certain just how minor they’ll be, nor am I certain whether I’ll even have a preference for one or the other at the end of it all. If you want to get as nitpicky as me, grab the tools listed below and follow along, as I have included a very brief “how to…”
- Soldering Iron
- Solder
- Wire Cutters
- Needle Nose Pliers
- Screwdriver

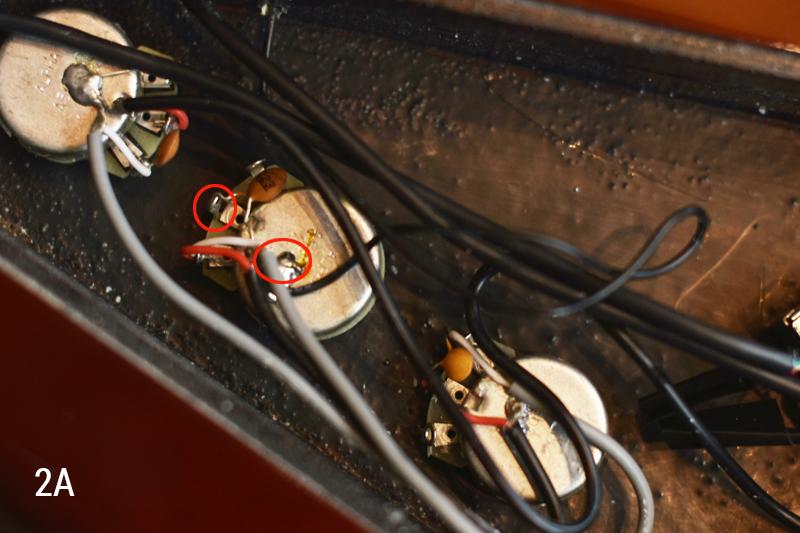
Now that the cavity is open we can take a look at what is going on under the hood. In my case, I have this bad boy wired so that there is only one tone control, which is on the middle pot. When we get to this point we will want to just make note of how our cap is soldered in so that we can copy this method with our new caps. Mine tone cap is connected to the center lug on the potentiometer, and also connected to the shield of that very same potentiometer.

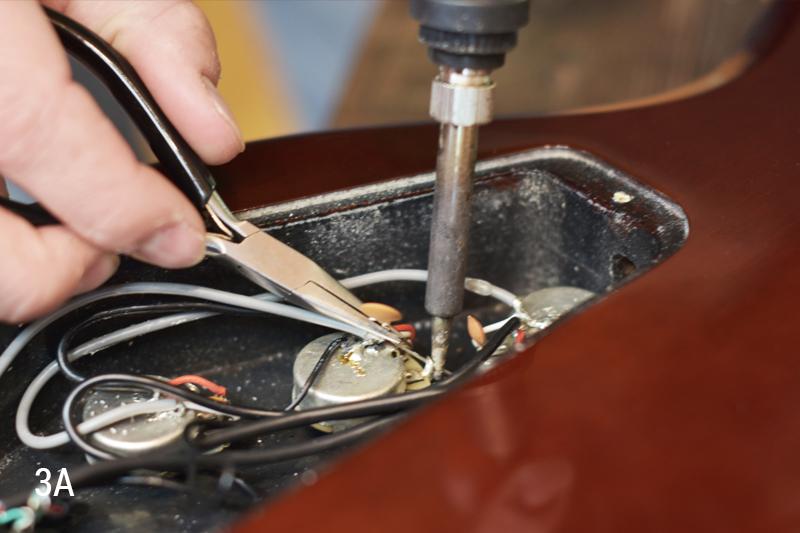
Let’s grab our needle nose pliers and soldering iron so we can pop that cap out. With one hand, heat up the solder connection on the center lug of the potentiometer and use the needle nose pliers in your other hand to pull the cap’s lead out of the lug.

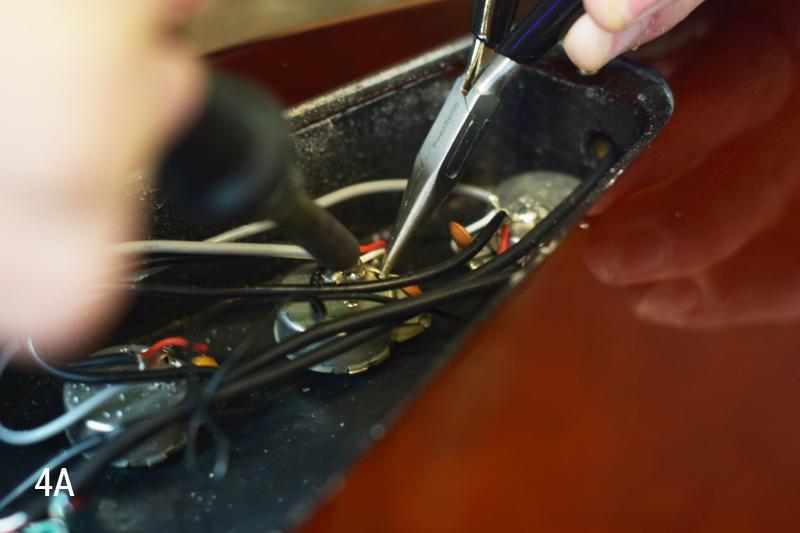
 Then you’ll need to repeat that process with the cap’s other lead. While I’m doing my A/B testing here, I’m not going to worry about clipping cap leads after installing them. I’m also not going to worry about removing the old solder from the joints. I will, however, advise both of the above AFTER you’ve decided which cap you want to leave in the guitar.
Next up, I’m going to install the ceramic cap from Mojotone. And yes, my guitar did come stock with ceramic caps, and yes I did just remove one, but for the sake of having a demonstration I’m just going to throw this new ceramic cap in there and give you all a sound clip to listen to. Alright, heat the solder on your pot’s center lug up, insert the cap’s lead through the lug and be still while the solder cools again.

 You may need to apply a little bit of solder at this point in order to make a solid connection, and that’s just fine. Now repeat that process with the connection point on the back of the potentiometer’s shield and you’ll be ready to see how it sounds!
SOUND CLIPS
I went ahead and swapped the rest of my caps in and out and made short recordings of each. I started out with the ceramic disc capacitor, then moved to the Orange Drop, and finally to the Mojotone Vitamin-T. I’m happy to report that I did hear some subtle...very subtle differences. The following sound clips are very straightforward. The first chord is with the tone control all the way up, the second chord is midway, and the third is all the way down. After that, I keep playing the chord and do some faster tone sweeps.
The ceramic disc was easily my least favorite. Many people might consider this type of capacitor inferior to the other construction methods featured in this article, but in all honesty the cap really doesn’t sound all that bad. The differences were subtle but I felt it ended up being slightly more shrill than the others. There was also a strange out-of-phase flavor when the tone control got between half way and all the way down. Honestly, I doubt I would have ever had an issue with its tone if I hadn’t conducted this little experiment.
The Orange Drop did not disappoint. I felt it had a certain warmth to it, and the faster sweeps were very pleasant and musical. It is the type of minor mod that will more than likely end up causing me to USE my tone control for a change. The Orange Drop did not seem to have the same out-of-phase flavor I experienced with the ceramic disc.
People have always raved about the Mojotone Vitamin-T caps, and now I feel silly for never having experimented with them. This was easily my favorite cap. It had that same warmth and almost vocal quality as the Orange Drop but I felt like the sweep was even more versatile. Every position of the tone control sounded like it could be well-utilized in music. Often times I feel like anything below halfway is useless, but this was actually a very defined warmth. I never felt like it got too muddy or womp womp. This cap had a lot of life whether it was wide open or...wide closed.
I did decide to leave the Vitamin-T cap in my guitar. But hey, everyone is different and there is no right or wrong answer here. Also, there are many other caps out there which I did not try out today. As always, I encourage you fellow DIYers to do as much tinkering as possible. Maybe you’ll hear a difference, maybe you won’t...maybe you’ll find a tone cap swap is exactly what you’ve been missing. No matter what you find, it’s a simple mod that can be done in a matter of minutes, and it’s a great excuse to open up your guitar and get acquainted with what’s going on inside.
I hope you had as much fun with this as I did. Thanks, for tuning in and we’ll see you next time!
Ceramic Disc
Sprague Orange Drop
Mojotone Vitamin-T